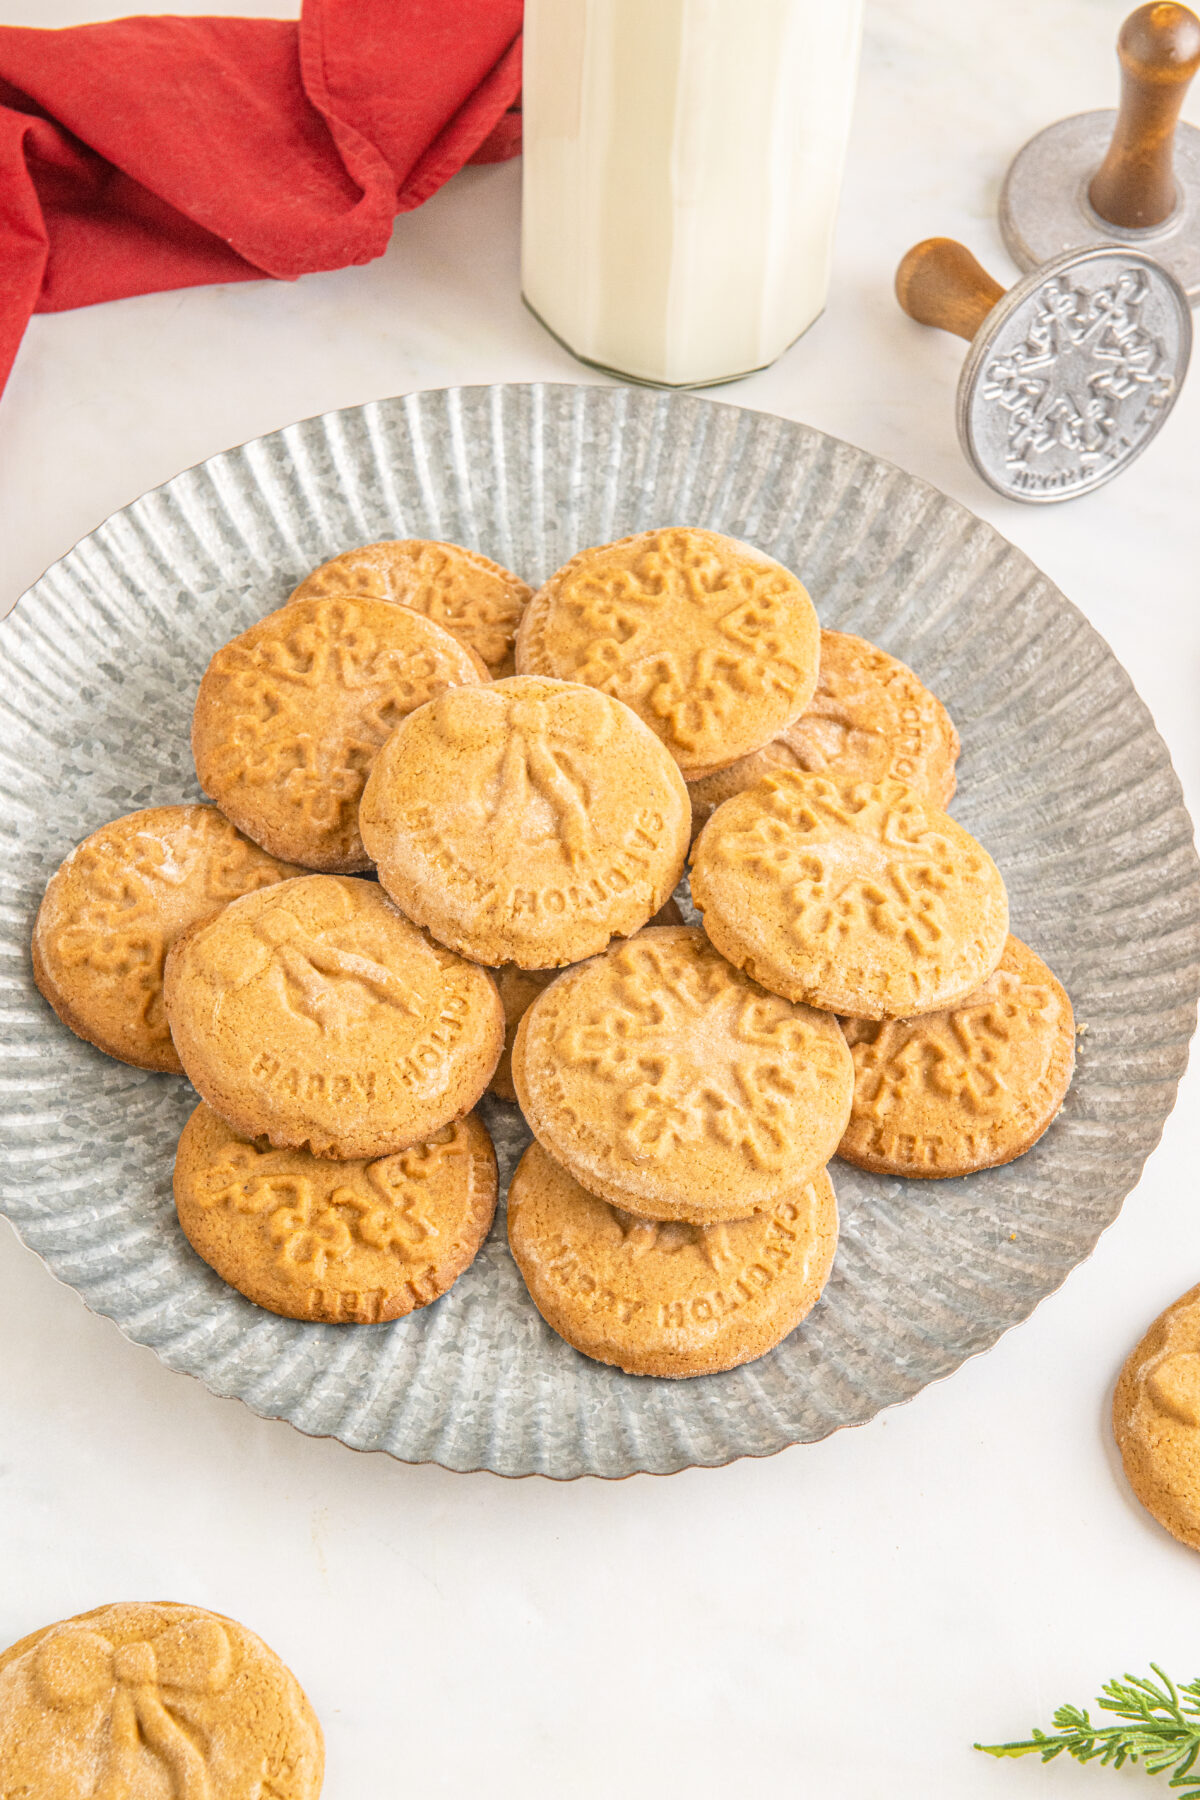
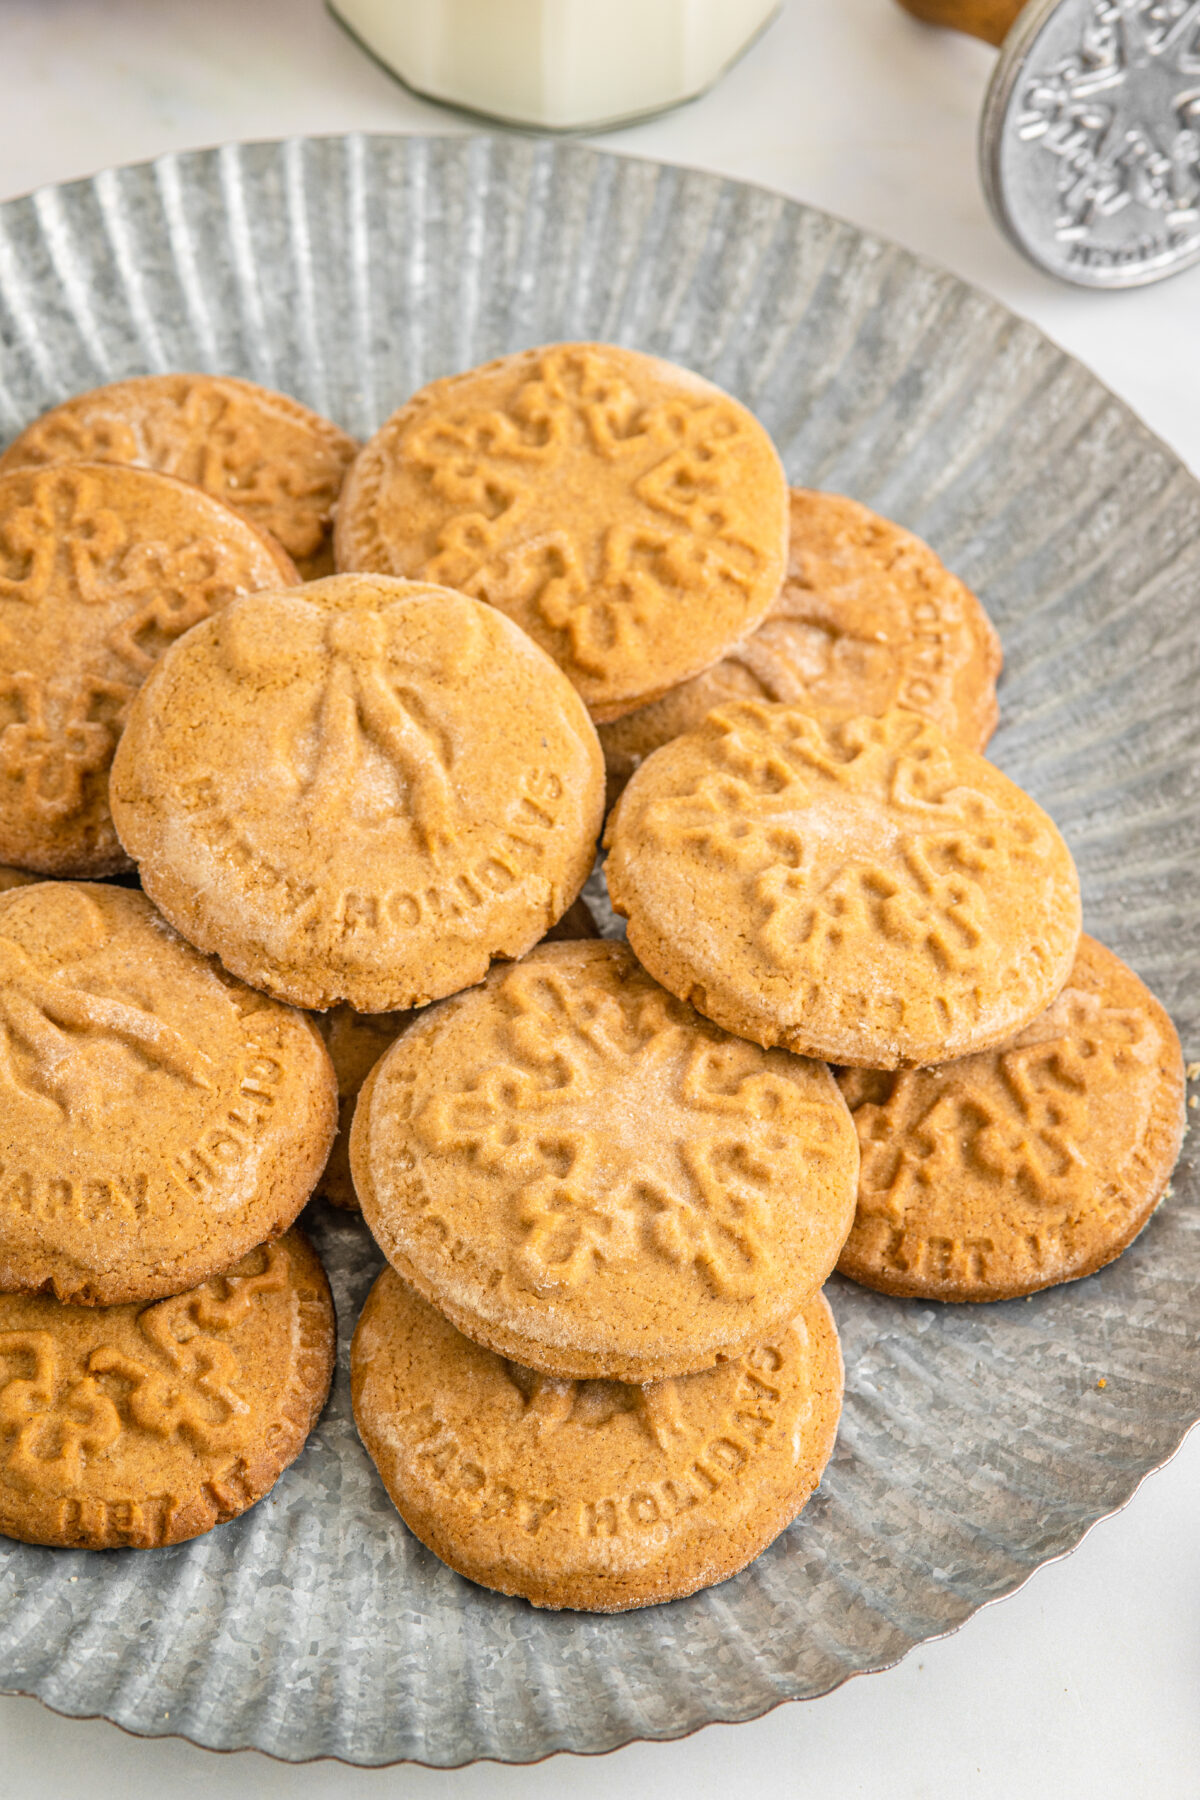
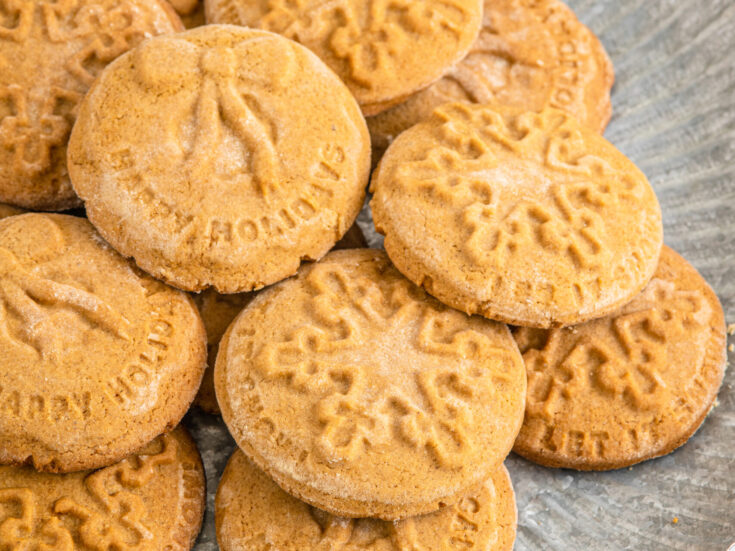
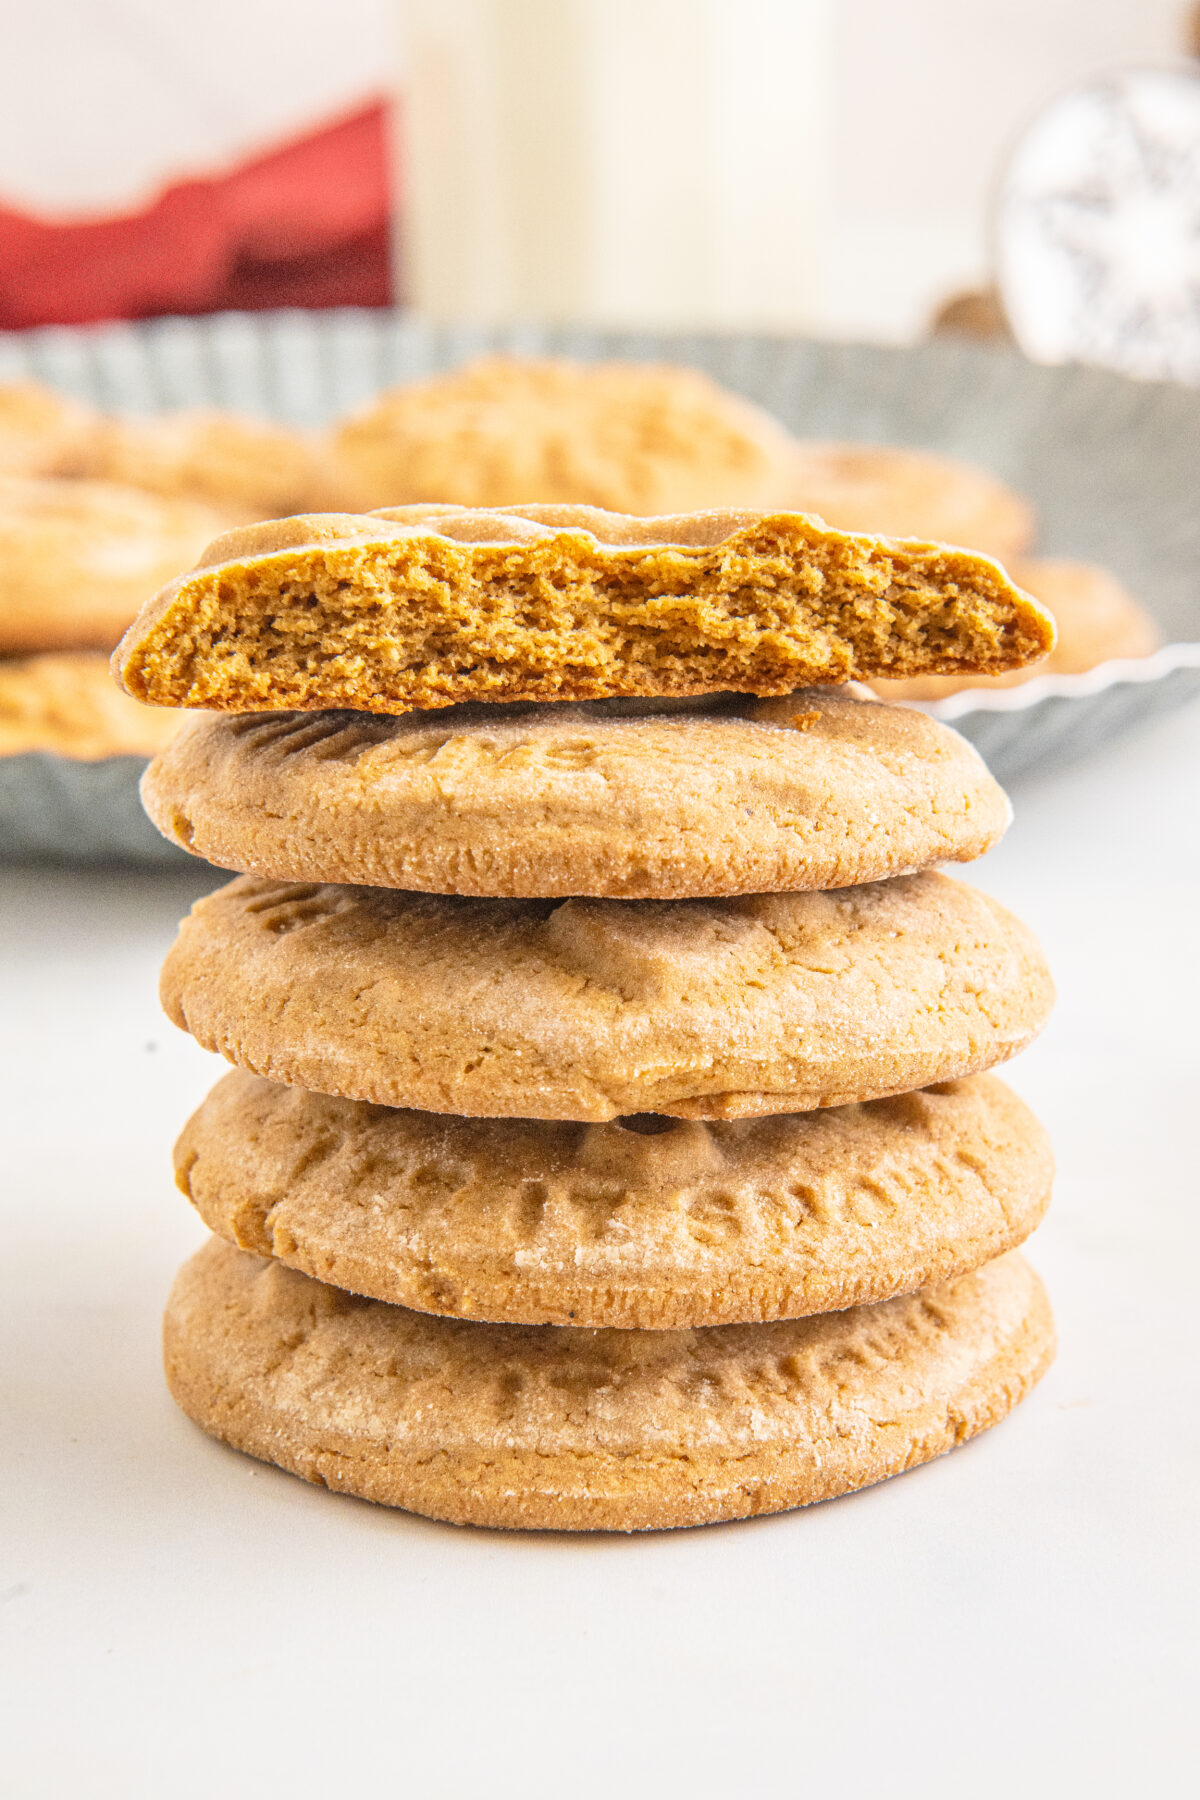
Stamped Cookies
Get your holiday baking underway with these delicious stamped cookies! These gorgeous cookies are perfect for gifting or sharing!
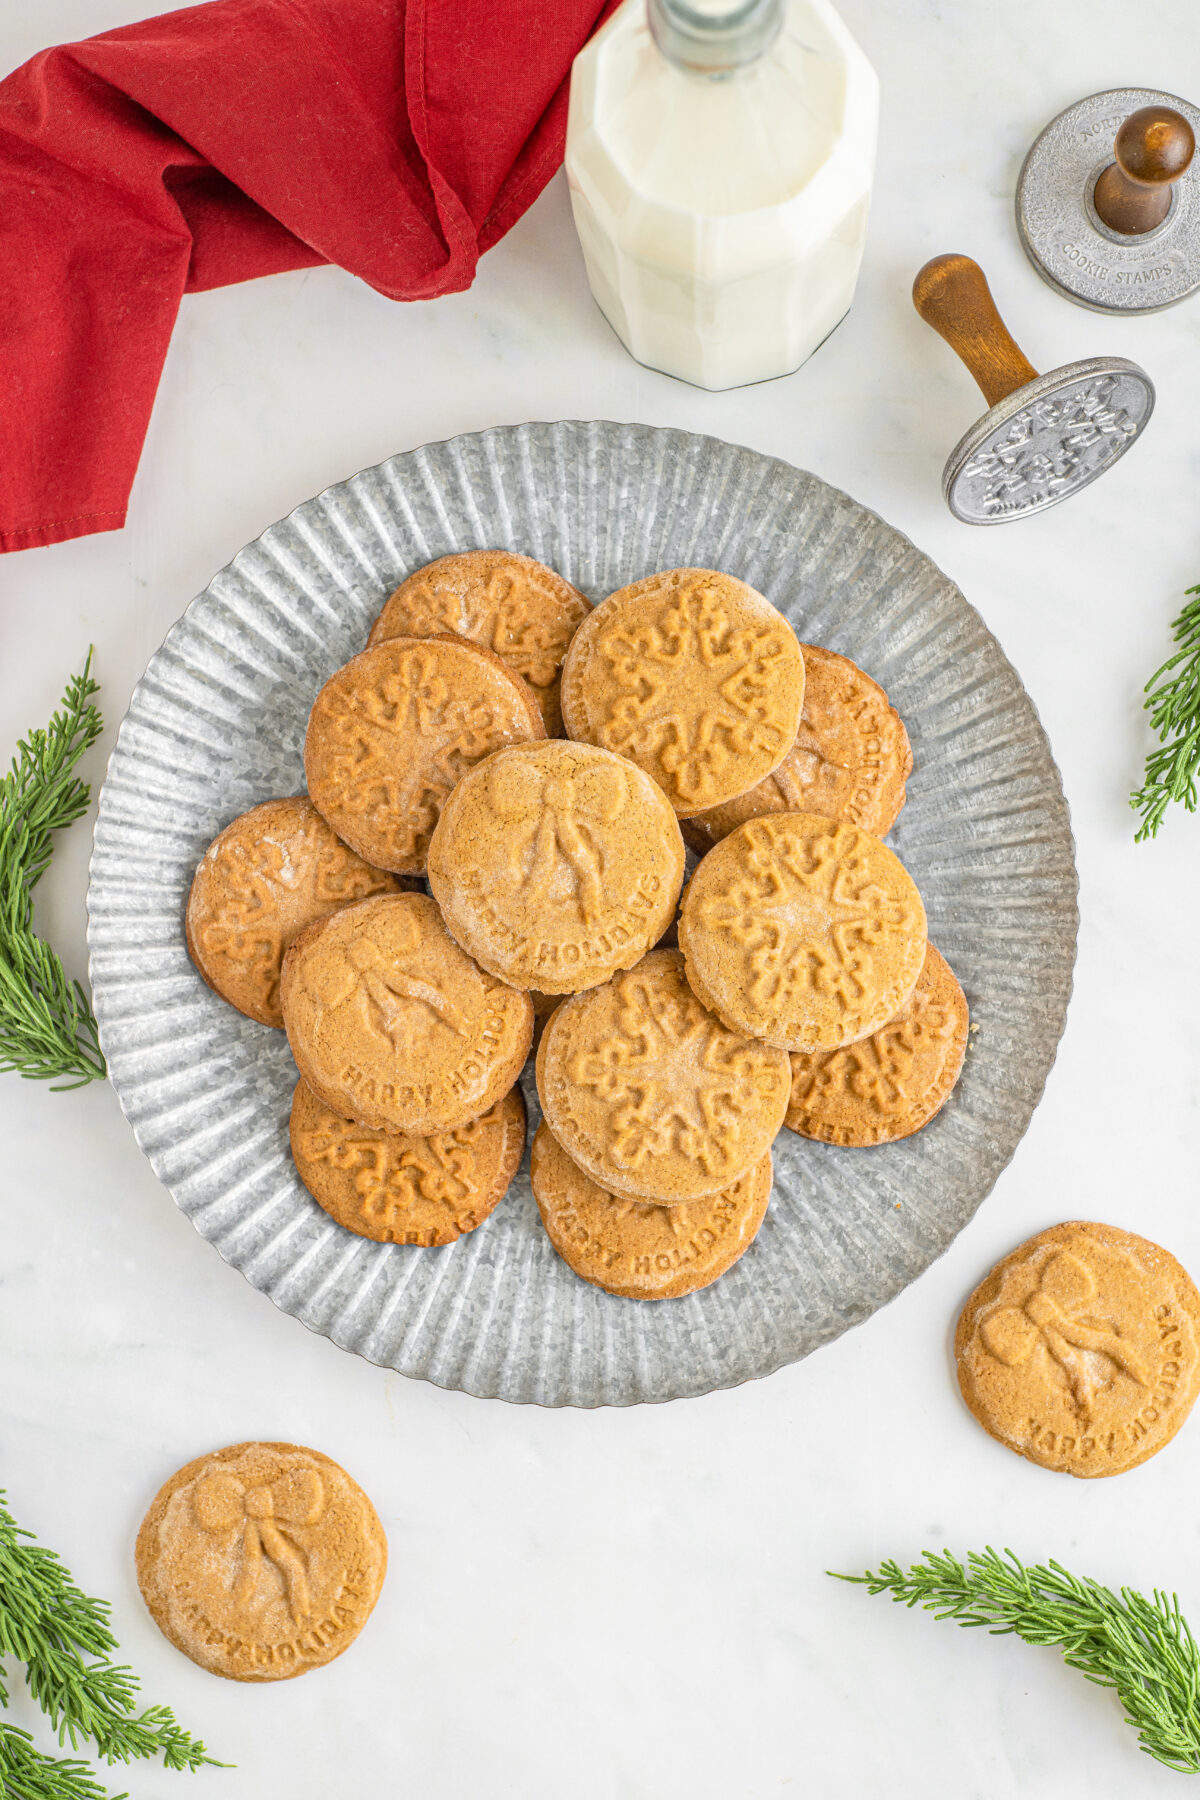
Tis the season of holiday baking! If you’re looking for a delicious and festive treat, then look no further than these easy to bake stamped cookies.
The flavour combination of cinnamon, nutmeg, and cloves with hints of molasses and vanilla will have your home smelling like the holidays. Plus, they only require a few simple ingredients that most people have in their pantry already – making them the perfect last minute dessert idea or go-to goodie for any special occasion throughout the year!
There’s something satisfyingly old-fashioned about stamping out beautiful designs onto these cookies – it’s the kind of kitchen craft that gets passed down generation after generation!
Get ready to start a new tradition with these classic stamped cookies!
Tips for Making the Best Stamped Cookies
- It is very important to use room temperature butter for this recipe. It should be soft enough to be easily pliable, but still firm enough to hold its shape. For best results, set butter out on the counter about an hour before mixing up the dough.
- Do not skip the refrigeration time. Refrigerating ensures the cookies hold their shape while baking.
- Use room temperature ingredients to make sure the dough combines well.
- Make sure you sift the flour if it is lumpy.
- Carefully spoon and level your flour – don’t pack it!
- Only just combine the batter, do not over-mix.
How to Store Stamped Cookies
Stamped cookies store well at room temperature in an airtight container – up to 3 weeks even! They will remain the freshest if eaten within 5 days.
You can also freeze the cookies for up to 6 months if they are wrapped well and stored in a freezer bag.

Equipment Needed to Make Stamped Cookies
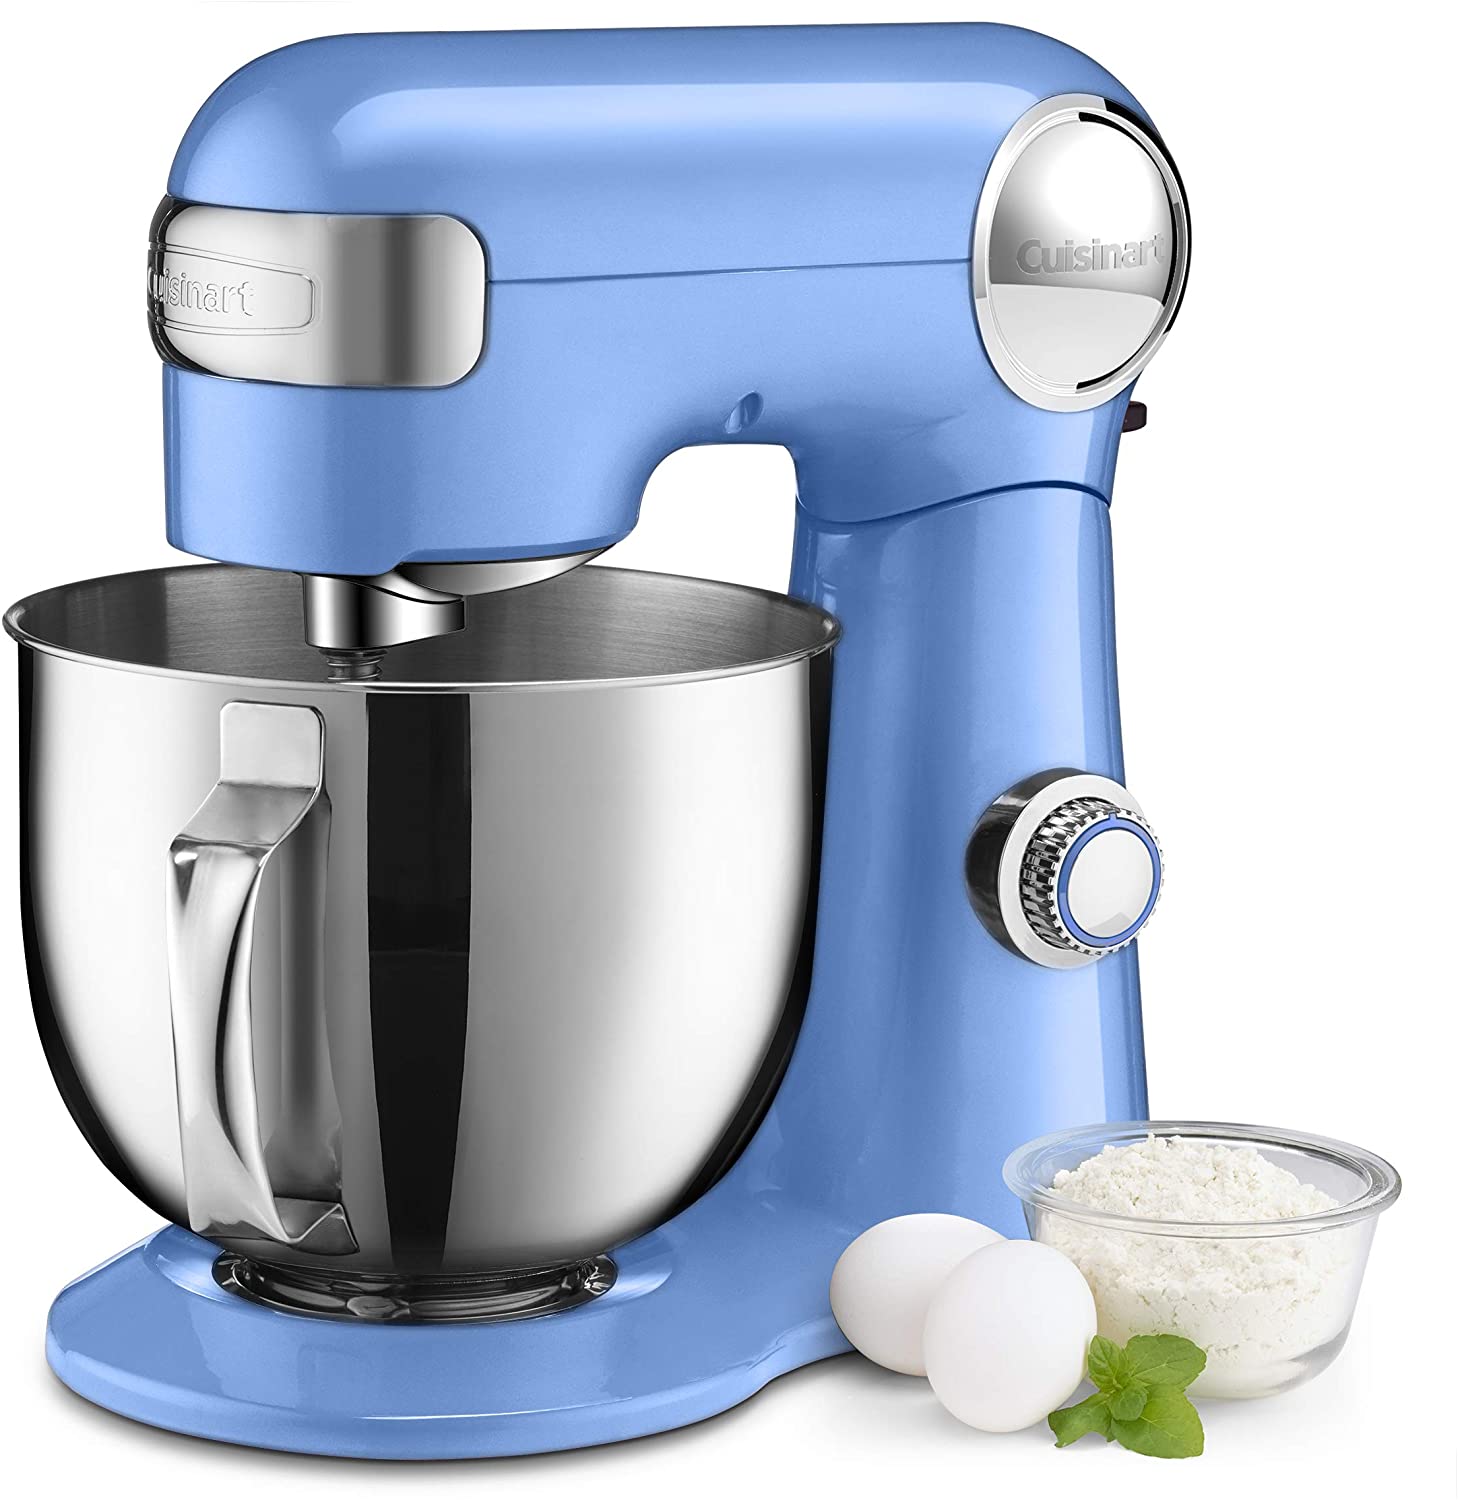
You will want to use an electric stand mixer or electric hand mixer to make these cookies.
You will also need a baking sheet and large cooling rack, you may also want to prevent waste by using a silicone liner instead of parchment paper. A cookie scoop is useful to ensure even sized dough balls.
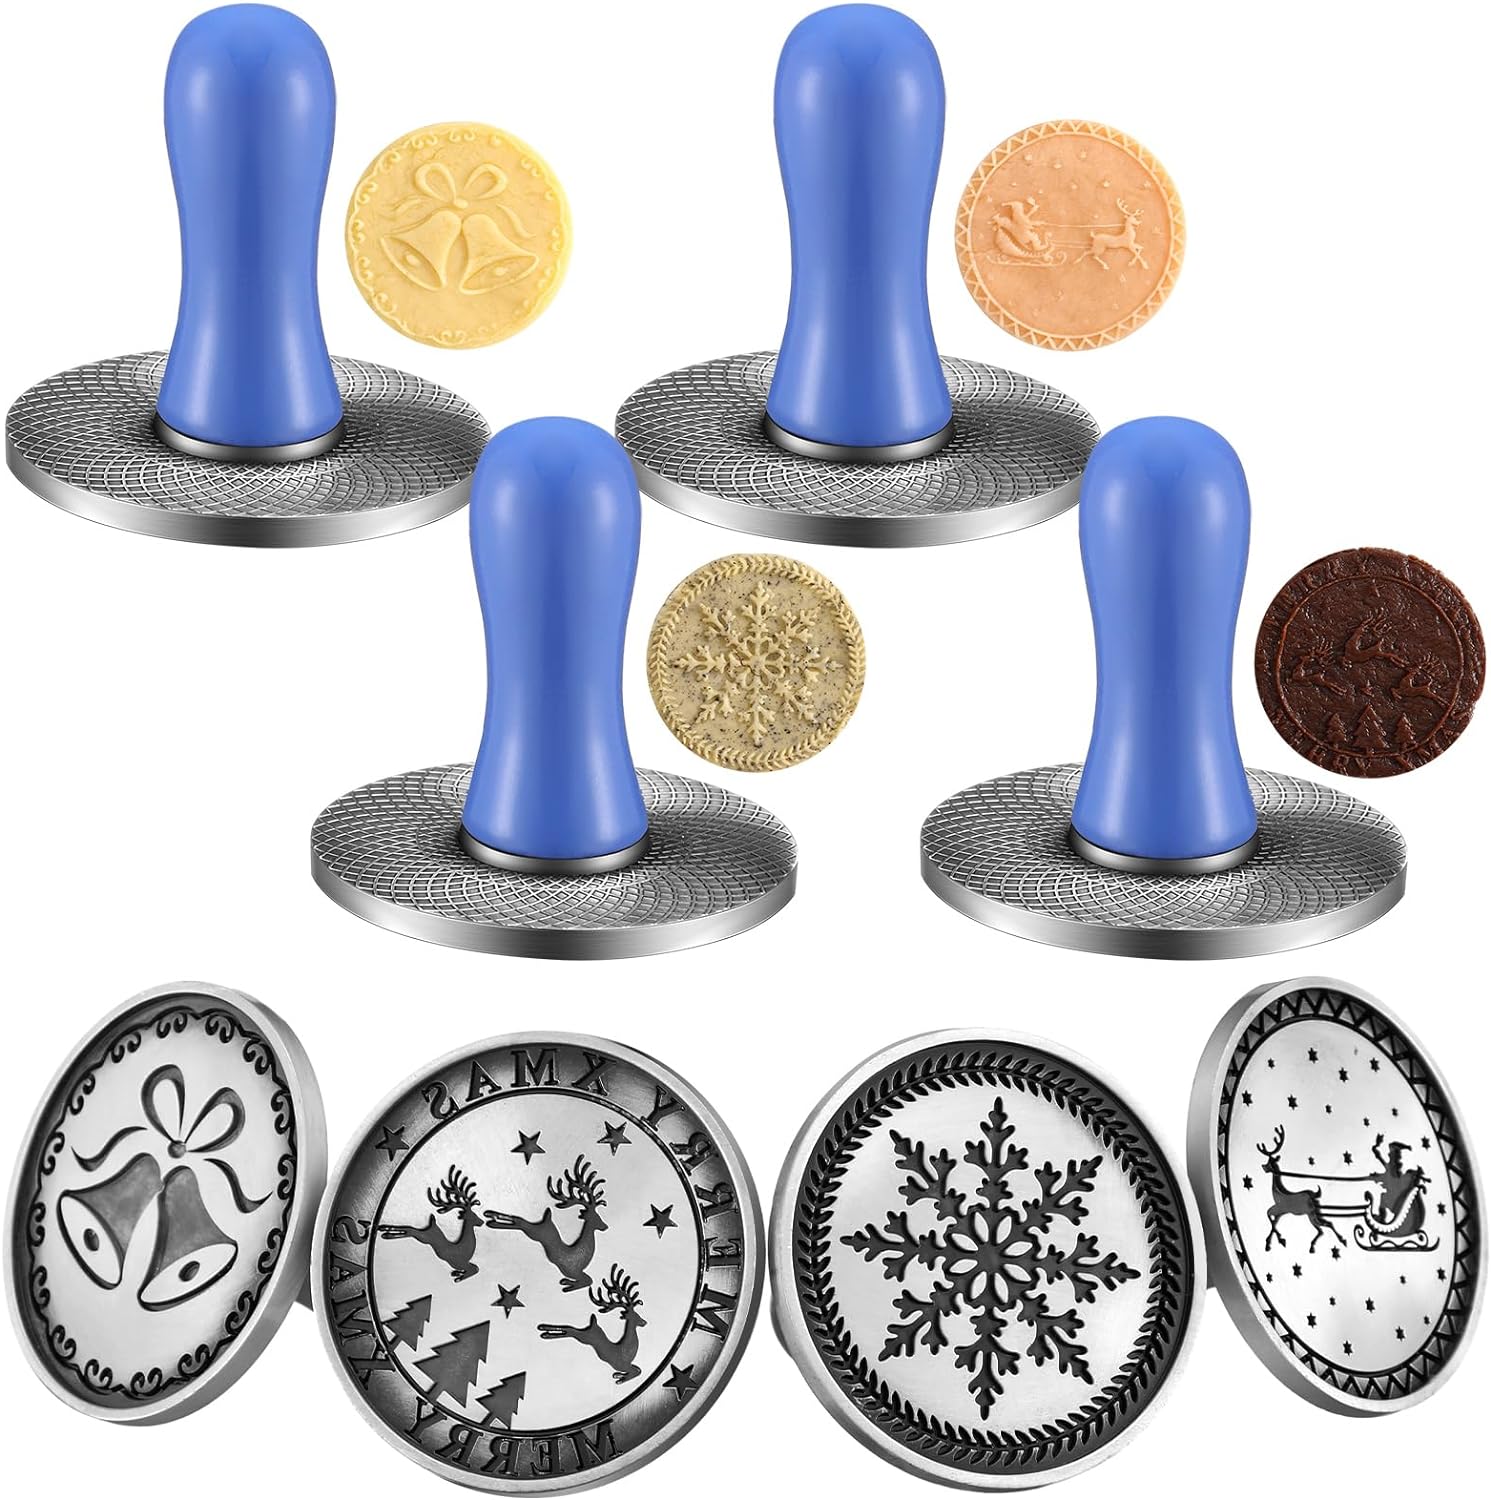
You will, of course, need cookie stamps. I used these nordic ware cookie stamps, although they are currently unavailable, but these Christmas cookie stamps are fairly close!
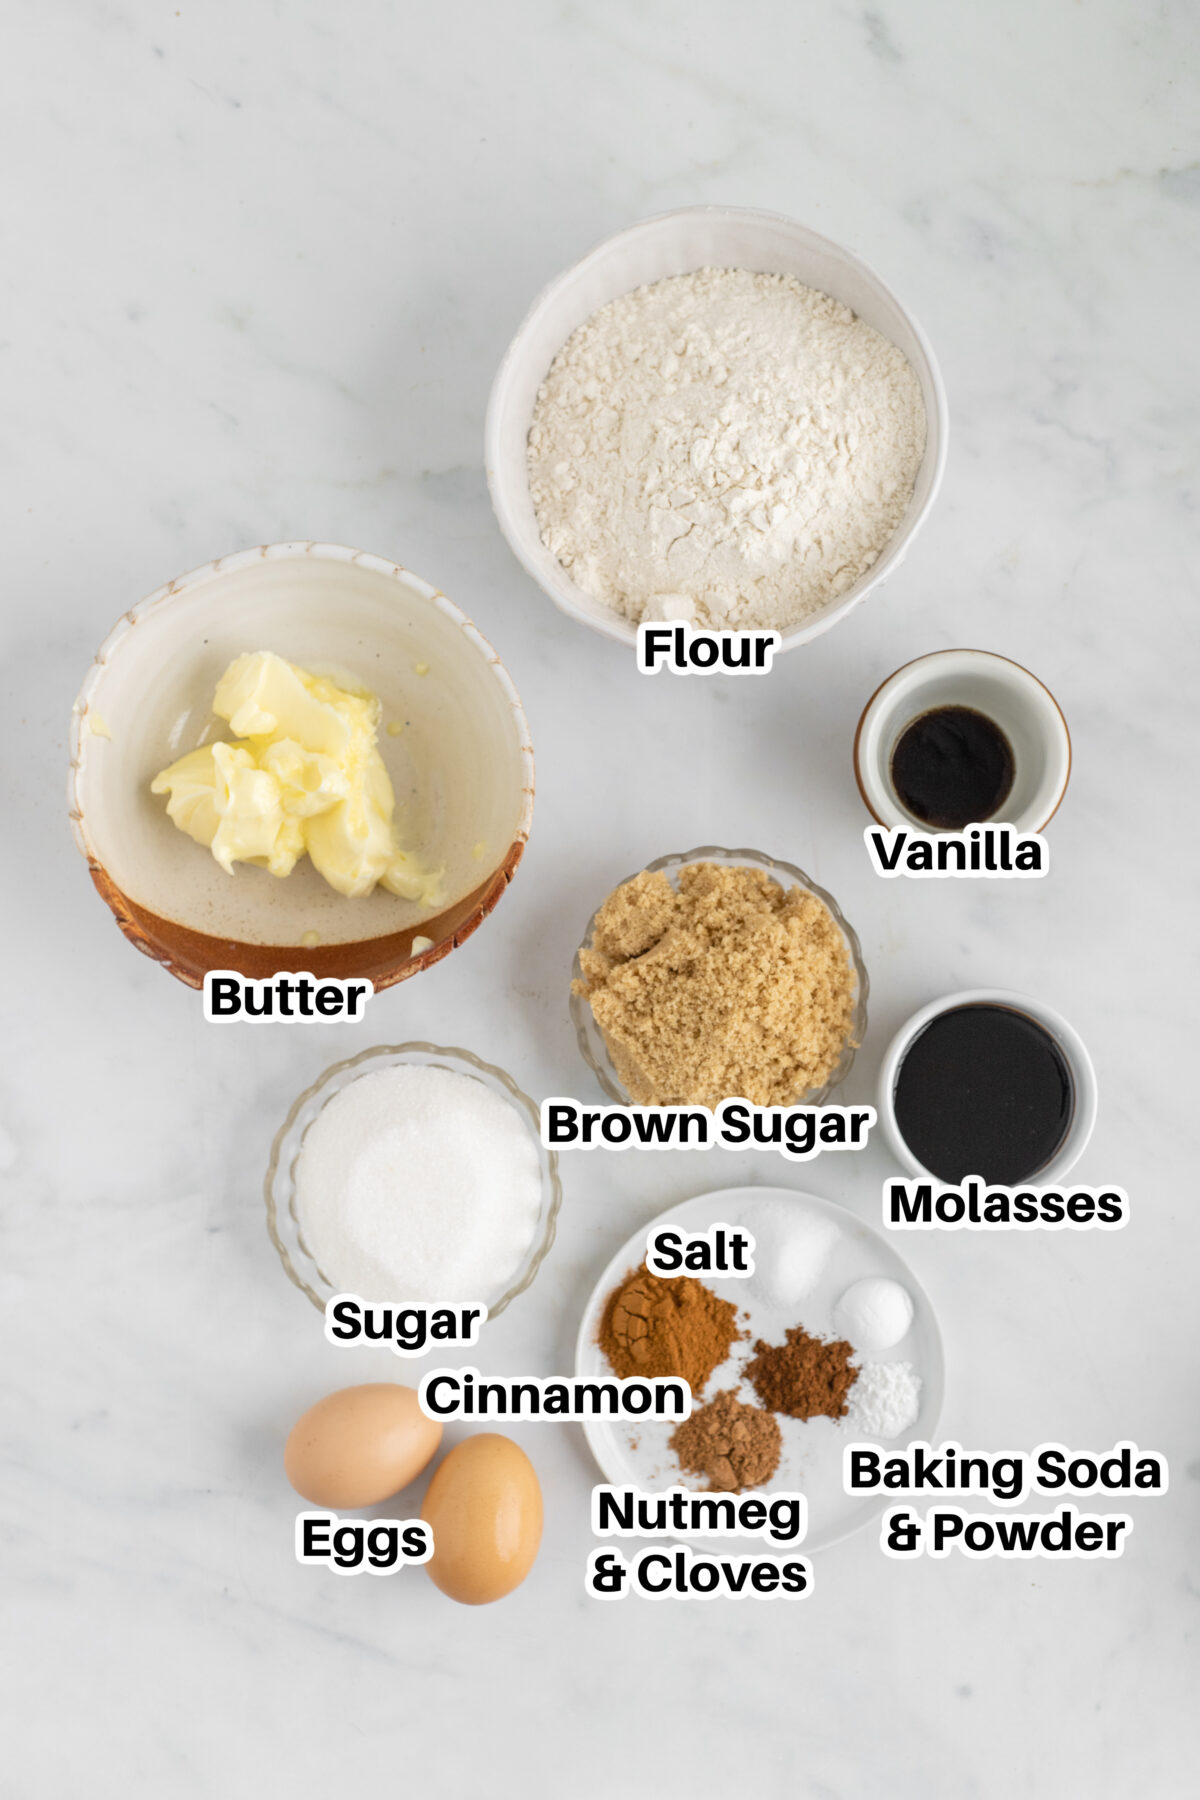
About the Ingredients for Stamped Cookies
Flour – Spoon and level the flour, never pack it or scoop directly with your measuring cup when baking. If your flour is lumpy, sift it in.
Spices – We are using a combination of cinnamon, nutmeg and cloves. You can use pumpkin pie spice instead. Mace is a good substitute for cloves.
Salt – Brings out all the flavours of the cookie.
Baking powder – Make sure your baking soda is either fresh or at least still active so that the cookies rise.
Baking soda – Make sure your baking soda is either fresh or at least still active so that the cookies rise.
Butter – Unsalted butter may be used instead. If used, add a slightly heaped ⅛ tsp of salt to the recipe.
Sugar – You can use light or dark brown sugar. I prefer using dark brown sugar as it gives the cookies a slightly richer flavour.
Eggs – Make sure your eggs are room temperature for the best results.
Molasses – I highly recommend using molasses for this recipe, but you may use honey instead.
Vanilla – Vanilla extract may be used instead.
Looking for More Christmas Cookie Recipes?
Check out more of my favourite Christmas cookies!
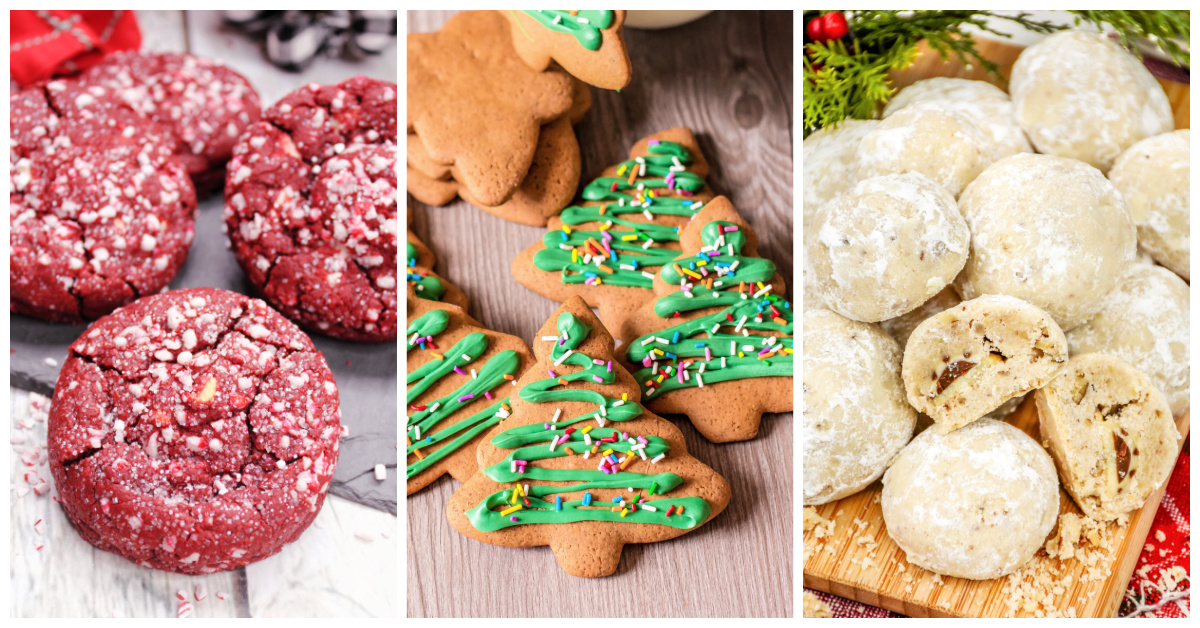
These candy cane stuffed red velvet cookies are a festive addition to your holiday party or cookie exchange!
This gingerbread Christmas tree cookies recipe is perfect for the holidays! They’re festive, delicious, and easy to make.
These chocolate kiss snowball cookies are a festive holiday treat. Easy to make, they’re perfect for cookie exchanges and gift giving too.
How to Make Stamped Cookies
Yields: 22 Servings | Prep time: 45 minutes | Bake time: 13 minutes | Chill time: 2 hours
Ingredients:
- 3 ⅓ cups all-purpose flour
- 1 ½ teaspoons ground cinnamon
- ½ teaspoon salt
- ½ teaspoon ground nutmeg
- ½ teaspoon baking soda
- ¼ teaspoon baking powder
- ¼ teaspoon cloves
- ¾ cup brown sugar, packed
- ⅔ cup salted butter, room temperature
- ¼ cup granulated sugar
- 2 large eggs
- 2 tablespoons molasses
- 1 ½ teaspoons vanilla bean paste
Directions:
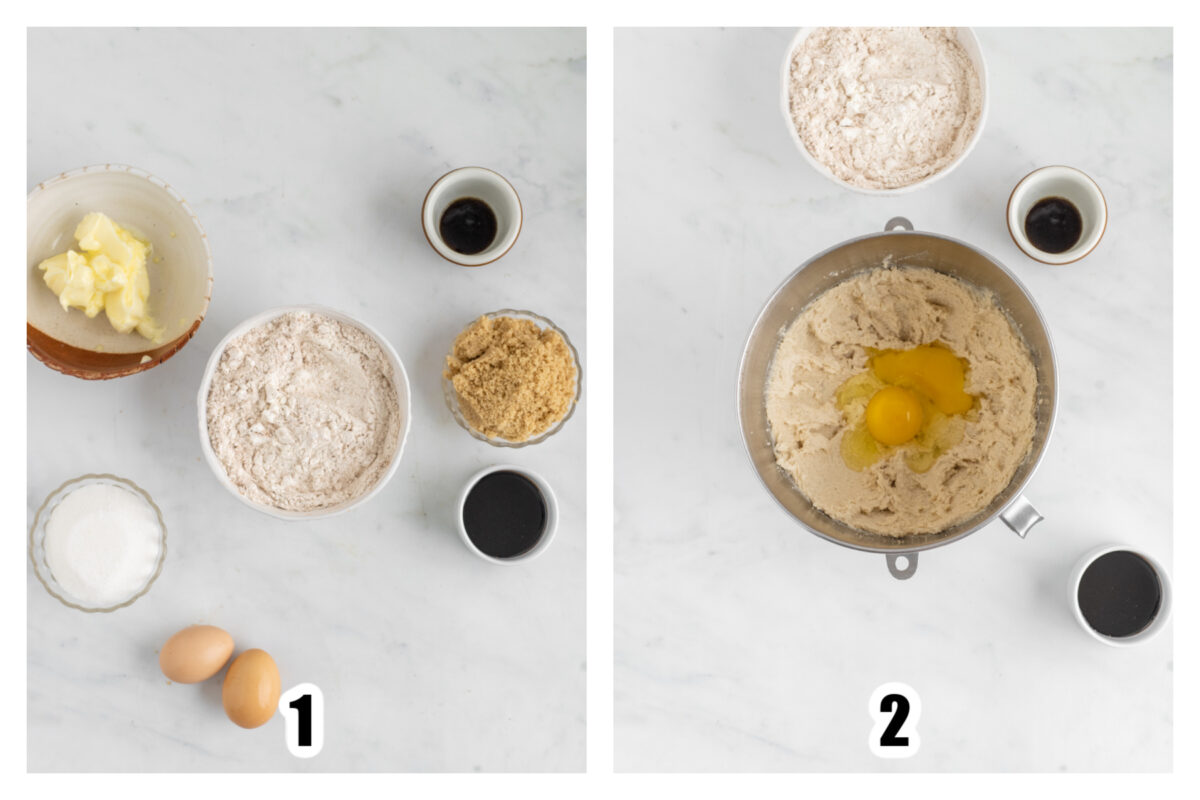
In a large mixing bowl combine flour, cinnamon, salt, nutmeg, baking soda, baking powder and cloves. (Image 1) Set aside.
In the bowl of a stand mixer fitted with a paddle attachment combine brown sugar, butter and sugar. Beat together on medium speed for 2 minutes, until fluffy.
Add in the eggs (Image 2) and mix for 30 seconds. Stop the mixer and scrape down the sides of the bowl with a rubber spatula.

Add in molasses and vanilla bean paste (Image 3) and mix until incorporated.
Add the flour mixture to the stand mixer bowl and mix until well combined. (Image 4)
Remove the bowl from the stand mixer and cover well with plastic wrap. Place into the fridge to chill for 2 hours.
Towards the end of the chill time, preheat the oven to 350° and line a baking sheet with parchment paper and lightly spray with baking spray.
Once the chill time is up, remove the dough from the fridge.
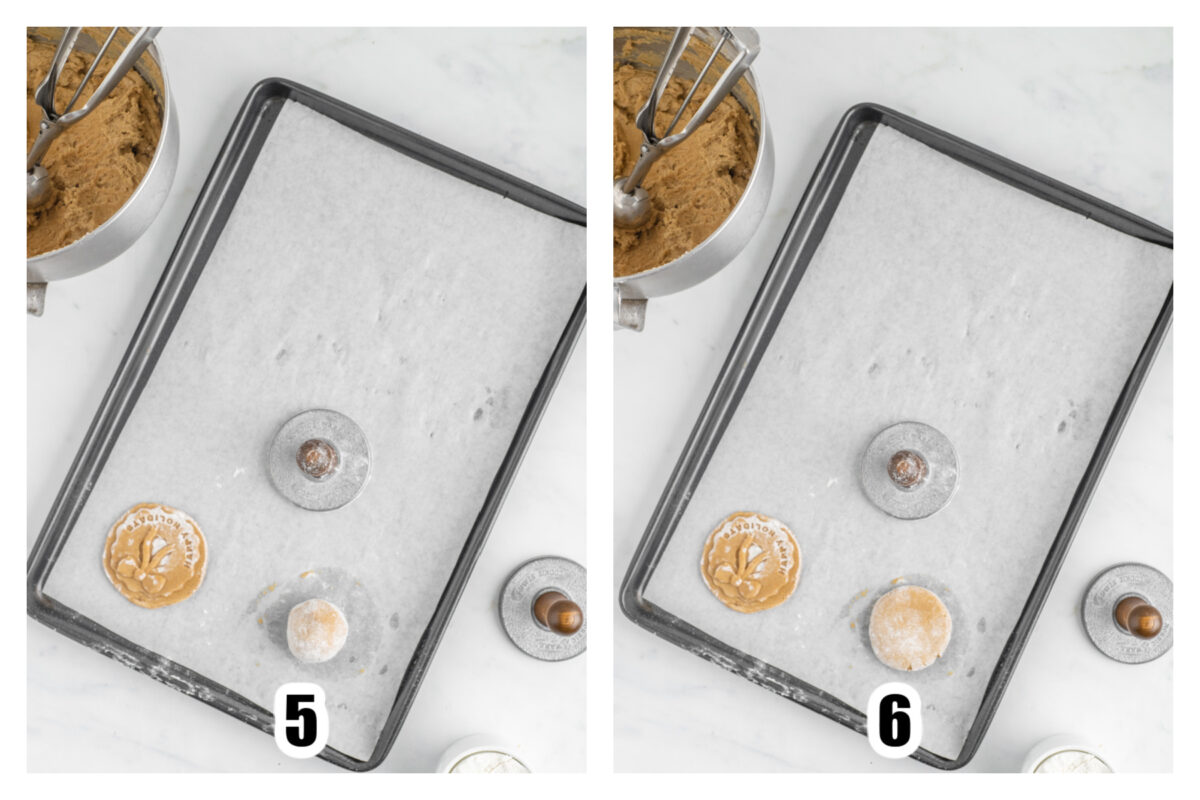
Use a 2 Tbsp cookie scoop to scoop out the dough. Roll each scoop into a ball, then roll into flour. Dust off any excess flour. (Image 5) Place 6 dough balls onto the prepared baking sheet and slightly flatten. (Image 6)
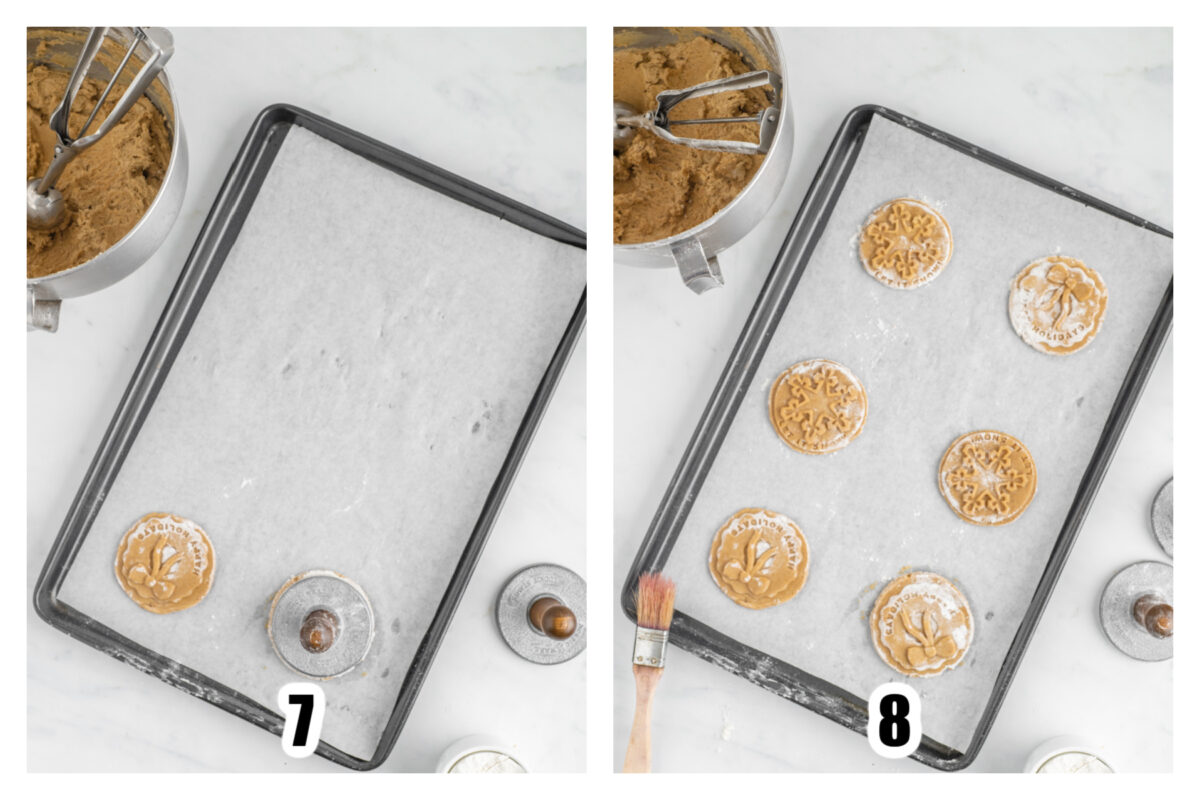
Dip the cookie press into flour, then place directly above the dough disc. Press down until the dough reaches the edge of the cookie press, then raise the cookie press to release the dough. (Image 7)
If the dough sticks to the cookie press you can gently peel it from the press, or holding the press above the cookie sheet, make a quick downward motion stopping before you touch the cookie sheet to force the dough off of the press.
Repeat with the remaining cookies. Make sure each cookie is spaced at least 1” apart from each other. (Image 8)
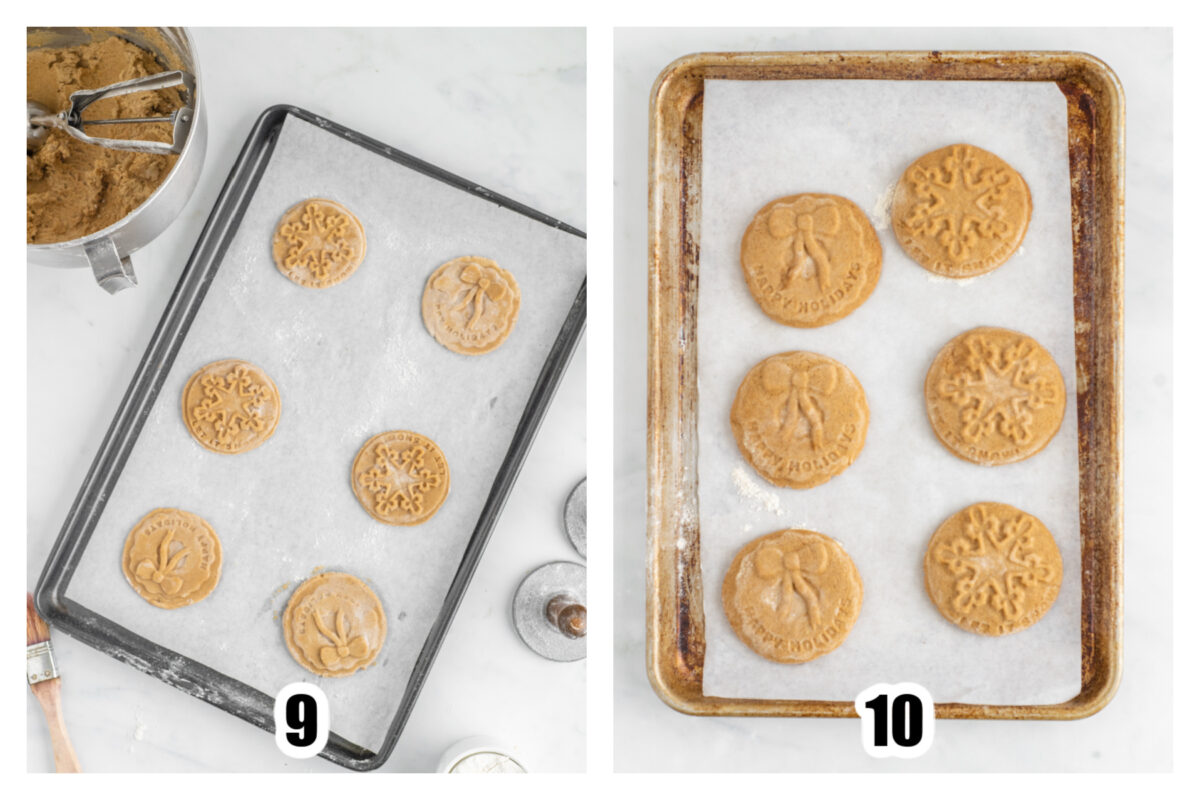
Place the pressed cookies into the preheated oven on the center rack. Bake for 13 minutes, until lightly golden brown and the edges are set. (Image 9 & 10)
Once baked, remove from the oven and let the cookies rest on the baking sheet for a few minutes to cool. Transfer to a wire cooling rack to completely cool.
Repeat the stamping and baking process with the remaining cookie dough.
Stamped Cookies
Get your holiday baking underway with these delicious stamped cookies! These gorgeous cookies are perfect for gifting or sharing!
Ingredients
- 3 ⅓ cups all-purpose flour
- 1 ½ teaspoons ground cinnamon
- ½ teaspoon salt
- ½ teaspoon ground nutmeg
- ½ teaspoon baking soda
- ¼ teaspoon baking powder
- ¼ teaspoon cloves
- ¾ cup brown sugar, packed
- ⅔ cup salted butter, room temperature
- ¼ cup granulated sugar
- 2 large eggs
- 2 tablespoons molasses
- 1 ½ teaspoons vanilla bean paste
Instructions
- In a large mixing bowl combine flour, cinnamon, salt, nutmeg, baking soda, baking powder and cloves. Set aside.
- In the bowl of a stand mixer fitted with a paddle attachment combine brown sugar, butter and sugar. Beat together on medium speed for 2 minutes, until fluffy.
- Add in the eggs and mix for 30 seconds. Stop the mixer and scrape down the sides of the bowl with a rubber spatula.
- Add in molasses and vanilla bean paste and mix until incorporated.
- Add the flour mixture to the stand mixer bowl and mix until well combined.
- Remove the bowl from the stand mixer and cover well with plastic wrap. Place into the fridge to chill for 2 hours.
- Towards the end of the chill time, preheat the oven to 350° and line a baking sheet with parchment paper and lightly spray with baking spray.
- Once the chill time is up, remove the dough from the fridge.
- Use a 2 Tbsp cookie scoop to scoop out the dough. Roll each scoop into a ball, then roll into flour. Dust off any excess flour. Place 6 dough balls onto the prepared baking sheet and slightly flatten.
- Dip the cookie press into flour, then place directly above the dough disc. Press down until the dough reaches the edge of the cookie press, then raise the cookie press to release the dough.
- If the dough sticks to the cookie press you can gently peel it from the press, or holding the press above the cookie sheet, make a quick downward motion stopping before you touch the cookie sheet to force the dough off of the press.
- Repeat with the remaining cookies. Make sure each cookie is spaced at least 1” apart from each other.
- Place the pressed cookies into the preheated oven on the center rack. Bake for 13 minutes, until lightly golden brown and the edges are set.
- Once baked, remove from the oven and let the cookies rest on the baking sheet for a few minutes to cool. Transfer to a wire cooling rack to completely cool.
- Repeat the stamping and baking process with the remaining cookie dough.
Recommended Products
As an Amazon Associate and member of other affiliate programs, I earn from qualifying purchases.
Nutrition Information:
Yield:
22Serving Size:
1 cookieAmount Per Serving: Calories: 165Total Fat: 6gSaturated Fat: 4gTrans Fat: 0gUnsaturated Fat: 2gCholesterol: 32mgSodium: 136mgCarbohydrates: 25gFiber: 1gSugar: 10gProtein: 3g
This information is provided as a courtesy and for entertainment purposes only. This information comes from online calculators. Although lifeloveliz.com attempts to provide accurate nutritional information, these figures are only estimates.

Liz Lampman is a coffee-fuelled Mom of 2 girls and lives in Hamilton, Ontario. She enjoys cooking and baking, food photography, and reading.